I've had this sailing dinghy for 24 years now. My Dad bought it for my brother and I with some money my grandparents sent for Christmas when I was seven. As kids we used to paddle around creeks and then we lived on the canal on the Gold Coast I sailed it around our back yard.
For all the abuse it received from my brother and I, and some dodgy gelcoat from when it was built when I was 14 I spent two weeks school holidays in a boat yard with a boat builder where I sanded, filled and faired the hull. The boat builder supplied teaching, all the material and sprayed the paint. The hull was a dull red tired gelcoat but now it was shiny smooth glossy white.
for the last 10 - 12 years it has been kept around with the intention of fixing it up. The deck was coming apart from the hull. There were a couple of holes in the deck, and the join inside the cockpit was delaminating in places.
So I began a restoration 3 years ago just after Matisse was born. It started out very dusty, and many small blisters were found. After lots of grinding, some fibreglass and epoxy adhesive the deck was once again joined to the hull and sealed. But then it sat idle and not much happened.
I then came across the Tubby Tug design, (there is a picture of one in the post below), I wanted to build one for Matisse to mess around in as she grows. My wife shook her head and said you need to finish that dinghy first before you start something else. So the last few weekends has seen work progress well on the sailing dinghy.
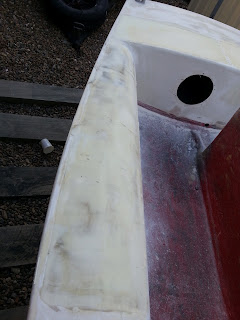
More glass added to some thin spots of the hull. The seat areas were filled with epoxy and micro balloons. The hull sanded again and some primer.
The deck is proving to be a bigger job though. Here are some photos, the deck is getting close to smooth and fair.
 |
| Seat Filled for Fairing |
 |
| This part looked dodgy so I will fill and make smooth. |
 |
| Boom Vang had nearly torn out here |
 |
| Blisters ground out and glassed |
 |
| Hole |


No comments:
Post a Comment